Hey Friends!
What a perfect, rainy day to learn how to read weather maps and make some amazing science art! I am glad you are here for our February Homeschool Day lesson, and I cannot wait to see you at the Albany Museum of Art!
In the meantime, don’t forget to share your work with us by emailing photos to: [email protected]

www.weather.gov/forecastmap
Here is a map of what our weather looks like on Feb 11, 2021!
Meteorologists–experts in or students of meteorology; a weather forecaster–draw all of these lines and dots over a map to show us what to expect of the weather. What do all of those markings mean though?
Meteorologists also give us what is called a map key to help us know what we are looking for! Can you tell which states it will be raining in today? What about freezing rain or thunderstorms? Better grab a jacket!
Can you print or draw a blank map of your state or country and fill it in with markings from the weather map key?
You can use the one above, or make up your own map key!
Here is Georgia. What should we fill it in to show todays weather?
A fun way to keep track of the weather is to draw a picture every single day! It is rainy? Sunny?
Let’s learn how to make a weather journal!
Let’s look at some art that has been at
the Albany Museum of Art!
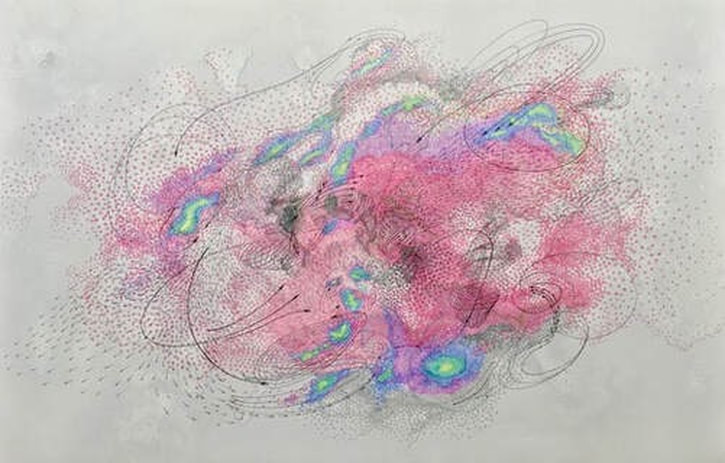
Take a long look at this work of art by Kalina Wińska.
It is titled ATMOSPHERIC GAZE # 6. It is made with graphite, colored pencils, and gesso on Yupo.
Discuss this work with a friend or a parent!
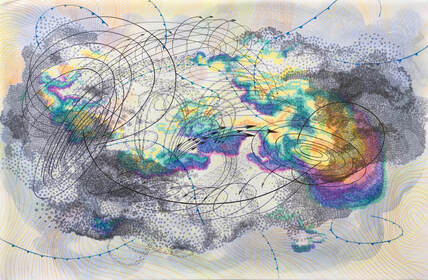
ATMOSPHERIC GAZE # 11
What is going on in these works?
What makes you say that?
What else can you find?
These are also weather maps! These maps were made by an artist who thought that making a map beautiful would grab the attention of viewers. By making this weather map, the artist is telling the viewer about how our climate is changing and how we must take care of our planet! Here is what she had to say:
”In my recent works, I explore various ways of observing and visually comprehending the weather through direct (human sight) and indirect means (e.g. satellite imagery.) Ultimately, in the process of making these works, issues such as our ambivalent relationship to climate change, concepts of weather modification, and the human drive to control natural phenomena resurfaced and provided more focused direction to my formal manipulations with materials and tools. The artworks are mostly mixed media drawings on paper or panel that formally explore indexical shapes of clouds in combination with meticulously layered symbolic signs of targets or molecular formulas of greenhouse gases. Furthermore, the variety of color shapes, as well as the symbolic and expressive marks and lines, are inspired by surface weather analysis data codes. I think of them as abstracted snapshots of cloudscapes visibly marked with human activity.”
— Kalina Wińska
Time for an Art Break!
Weather maps are so important for us to learn how to read! They let us know what to expect, whether it be a warm sunny day, a windy day or a stormy day. We are going to do a fun activity that teaches weather concepts as well as color theory.
SHAVING CREAM RAIN CLOUDS
The hows and whys:
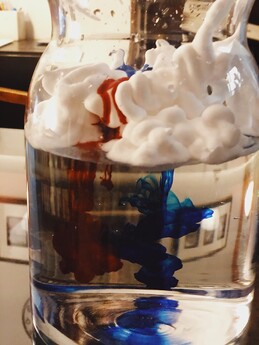
As the water gets too heavy for the “cloud,” it begins to release it into the “atmosphere” (aka, the water), therefore creating “rain.”
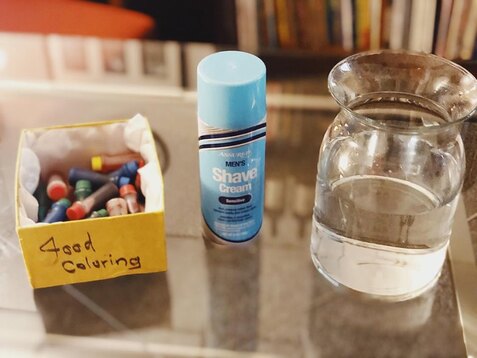
Materials:
1 clear container
Water
Shaving Cream
Food Coloring
Directions:
Fill your container a little over half way with water. Use your shaving cream (whipped cream will work as well) to create small or large clouds on top of the water. Pick three food coloring dyes, I chose a red, a blue and a yellow. These are our primary colors and I will be observing how they mix! Add a few drops of each color to the tops of your clouds, observe and record with a paper and pen what happens as they make their way through the clouds and into the atmosphere. If you made a large cloud, you could add some water on top of your cloud to make it even heavier and speed up the process.
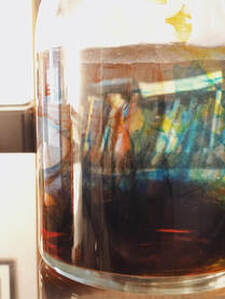
These colors are “raining” down into the atmosphere because the cloud got too heavy. This is called precipitation!
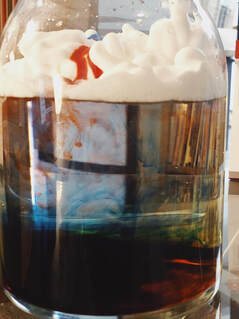
Notice how the colors begin to mix?
We can now see green, purple and even orange begin to appear!
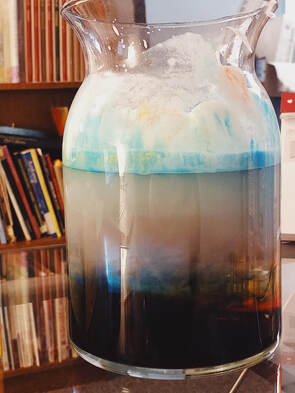
After a while, the color has settled to the bottom of the atmosphere and the water on top has cleared back up!
When the rain in our atmosphere collects into the ground and bodies of water (like ponds and rivers), it is called collection, or run-off.
Let’s shake things up!
Once all of your rain has settled, gently shake or stir your jar. You will notice that all of your colors will mix into one, and be forced back up into the atmosphere!
When the sun comes out after it rains and the wet grounds dry up, where does all the rain water go? Back up into the atmosphere to form a brand new cloud! This is called evaporation.
You can do this experiment over and over with different variations, such as different sized clouds, different temperatures of water and different colors of rain. Make sure to record your findings on a chart with details about the different variations you used!
Don’t forget to share your work with us. See you soon!